
SharePoint Token
Get SharePoint Token
In the first step of SharePoint Connector configuration, you will be asked for login information. These can be a little tricky to find. This guide will help you get them. Be careful to keep all the information that you will be asked to create.
Step 1: Save the application to SharePoint
Make sure you are already logged in to SharePoint, then go to :
https://your_sharepoint_domain/sites/your_site/_layouts/15/appregnew.aspx
(replace your_sharepoint_domain with the domain of your SharePoint site and your_site with the name of your site).
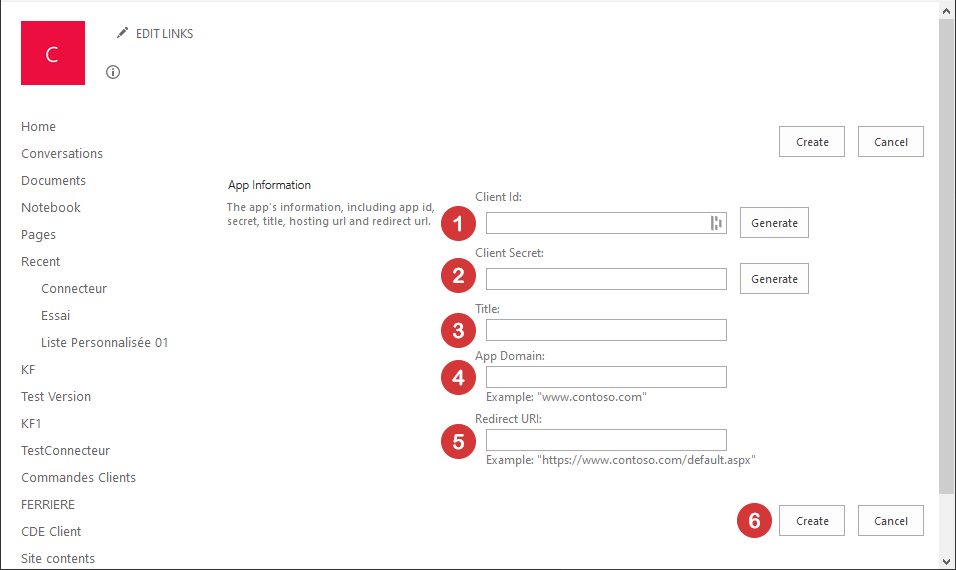
- Click on "Generate" for the "Customer ID" field.
- Click on "Generate" for the field "Secret customer key".
- Enter the name of the added application: "Kizeo" for example.
- Enter "kizeoforms.com"
- Fill in with https://www.kizeoforms.com/
- Then click on "Create" and make sure you have copied the client id and client secret key (the client secret key will never be communicated to you again).
Then go to https://your_sharepoint_domain/sites/your_site/_layouts/15/appinv.aspx
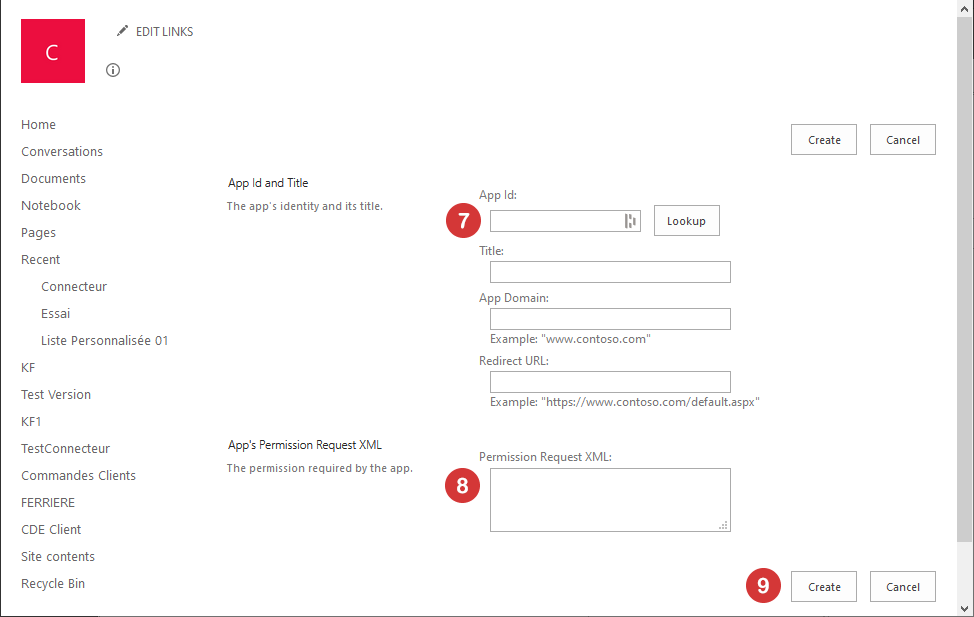
- Fill in the client id in the "Application ID" field, and click on the "Search" button.
- In the "Authorization Request XML Code" field, copy the following code:
<AppPermissionRequests AllowAppOnlyPolicy="true">
<AppPermissionRequest Scope="http://sharepoint/content/sitecollection/web" Right="FullControl"/>
</AppPermissionRequests>
- Then click "Create" and trust.
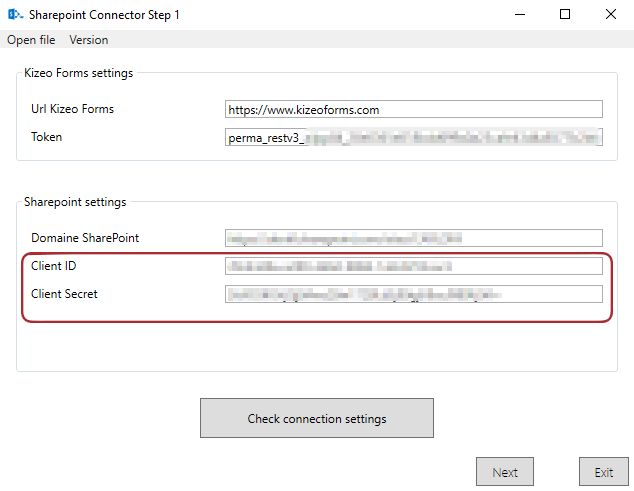
So far, you've had:
- the client id
- the secret id
- the SharePoint URL
You are now in possession of all the identifiers requested in the Wizard of the SharePoint Connector.
Step 2: Grant approvals to the SP Connector
1) Managing site permissions
Go to the page of the site to which the SharePoint Connector should have access.
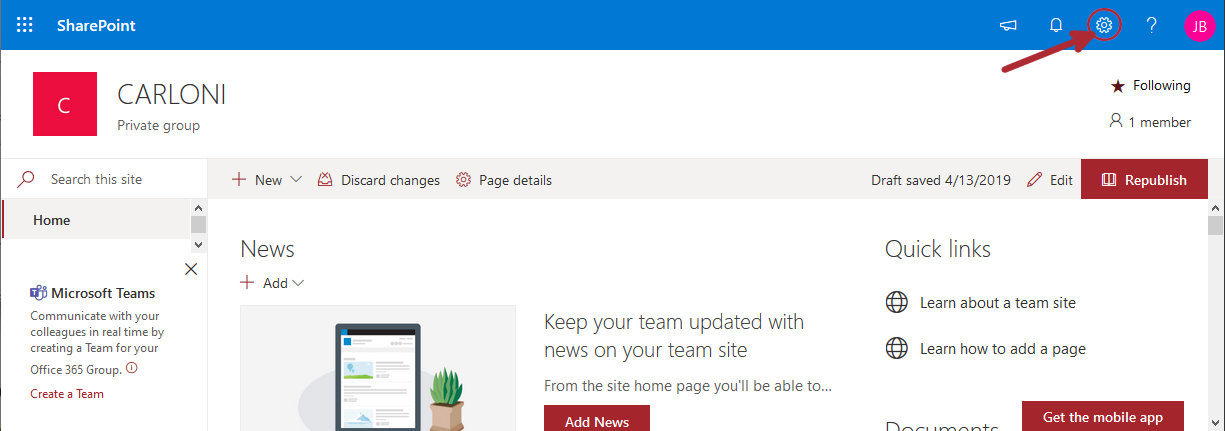
On the right, click on the gear logo to select the settings for this site. On the menu that appears, select "Site Permissions".

Please change the permissions so that Members and Owners of the site can have total control.
2) Create a connector-specific authorization group
The SharePoint Connector provided requires certain permissions to communicate with your SharePoint site. Thus, you need to create a specific group with the settings that allow the connector to recover your data. To do so, still on the same window as before, select "Advanced permissions settings".
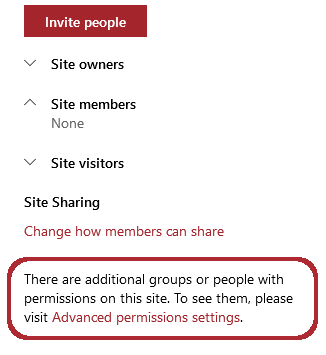
You will then arrive on a page with several SharePoint groups. Locate the ones reserved for Members and Owners. These should stand out by name.
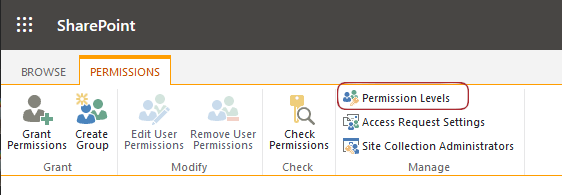
Click on "Permissions Levels" to access the list of authorization configurations.
On this page, select "Add a permission Level".
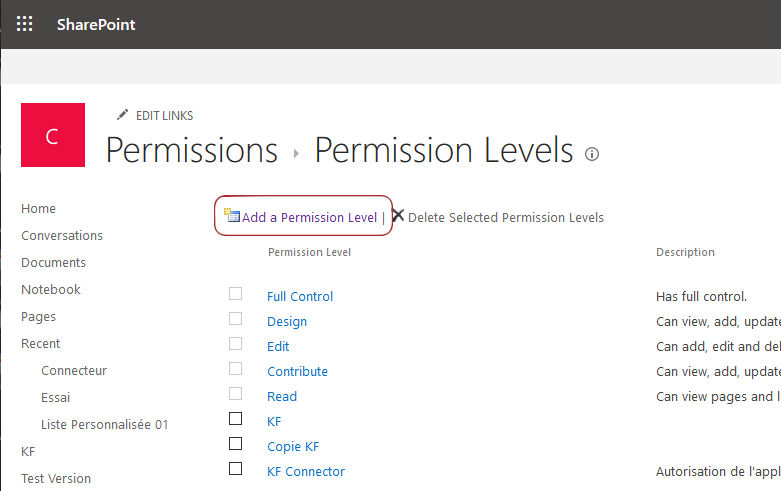

- Choose a simple name, such as "KF connector".
- Enter description (optional)
In the sub-section "Site Permissions"...
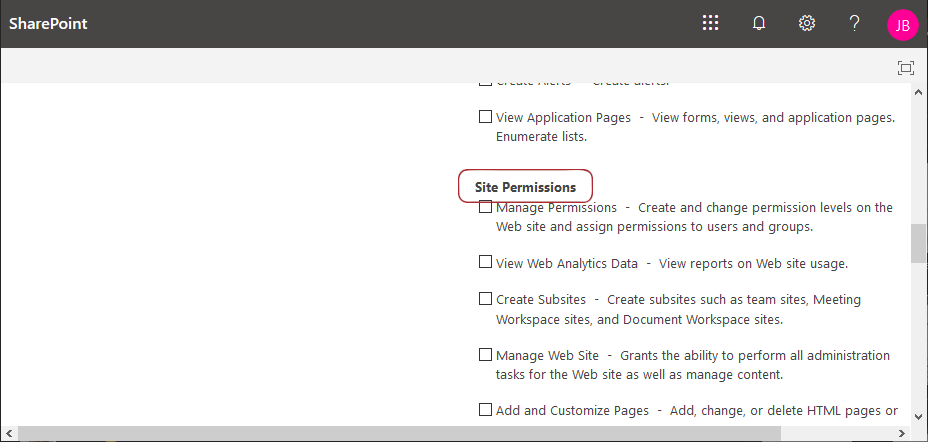
...you'll see a check box:
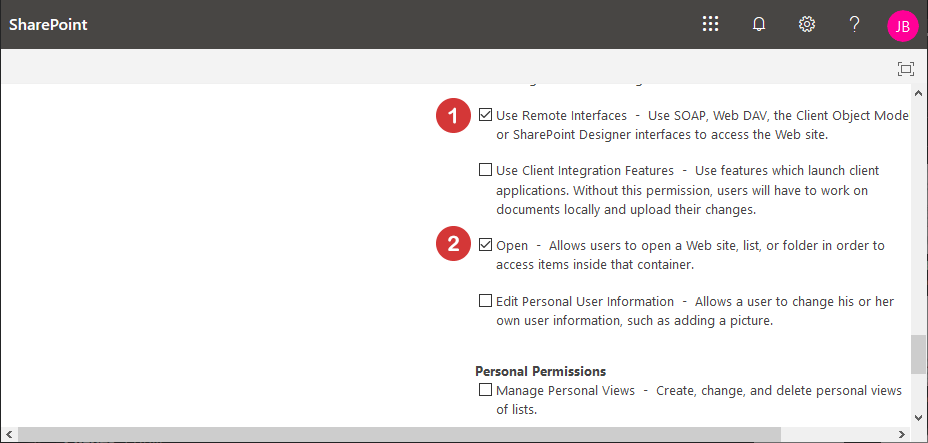
- "Use remote interfaces - Use SOAP, Web DAV, the Client Object Mode or SharePoint Designer interfaces to access the Web site" - Please check this box.
- "Open - Allow users to open a Web site, list, or folder in order to access the items inside that container" will be checked automatically.
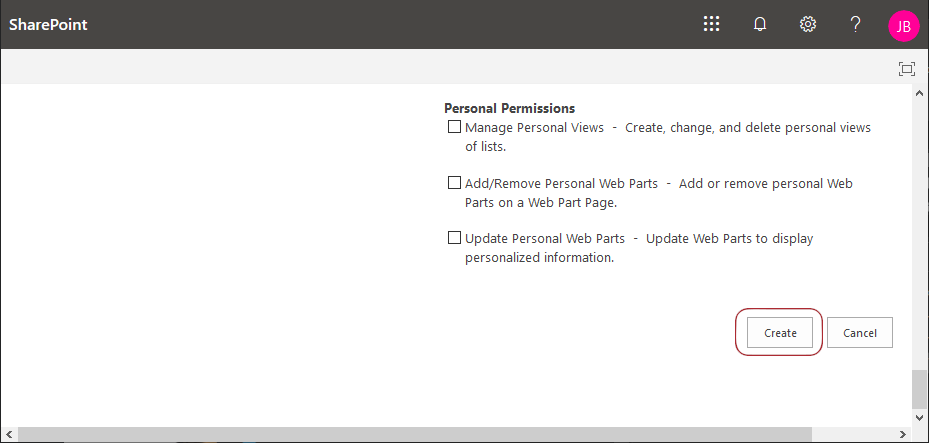
Save the changes by clicking on "Create" and then return to the page containing the list of groups.
3) Grant the authorizations created
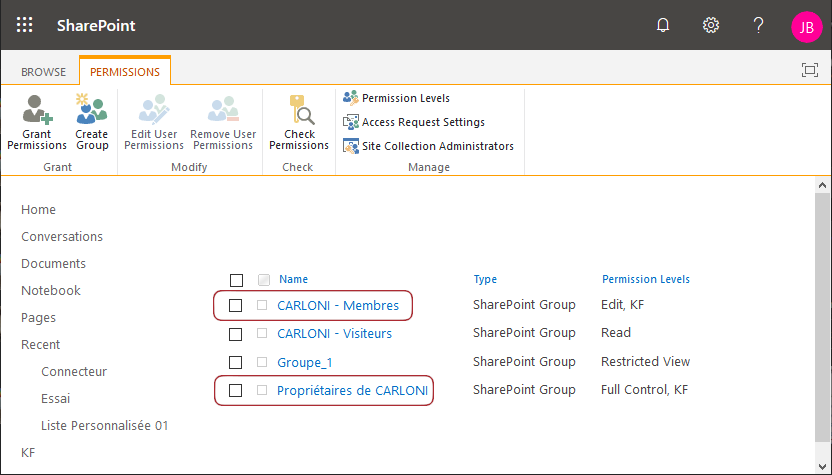
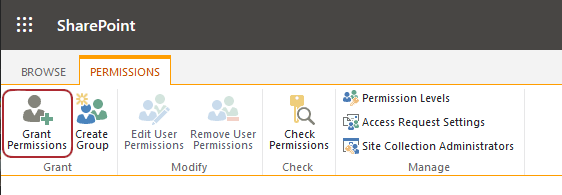
Once these permissions have been created, they must now be assigned to a group. To do this, please click on the button on the left.
In the first text field, enter the first few letters of your members group name. In our example, I type "CAR" for "CARLONI". You will then see the group of members; select it.
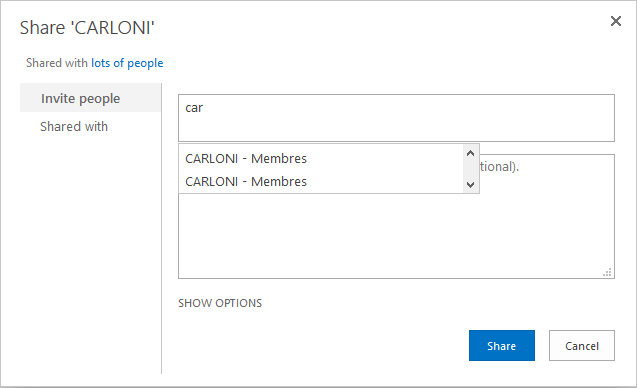
Also enter "owner" and select the owner group.

You will see a "Show Options" label underneath the two text fields; click on it.

Deselect the checkbox (which should already be checked by default) corresponding to sending a electronic invitation.
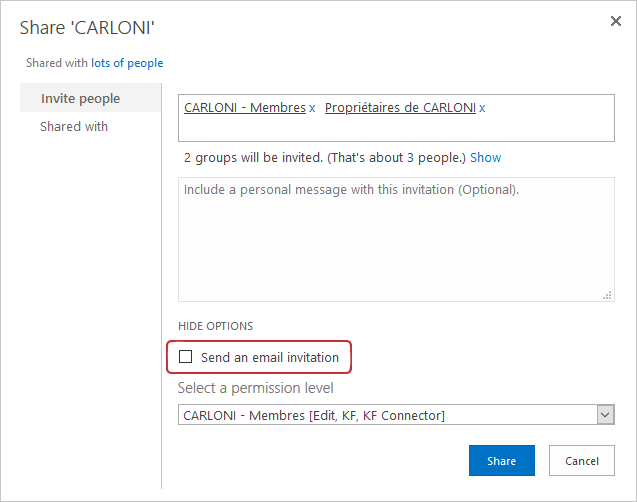

- Then choose the authorization level we created in step 2 from the drop-down list.
- click the "Share" button
Refresh your group list page.
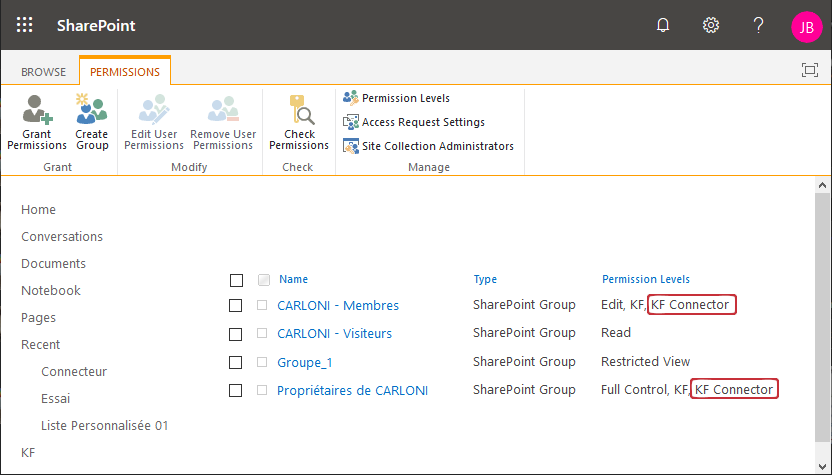
The new rules that we have defined are indeed present in the authorization levels.